Welcome to my bonsai blog!


Welcome to my bonsai blog!

Look around! Use the Search box, browse the Archive, and leave comments. Click on any picture to enlarge it.
I would be honored to have you follow my posts. There are two ways to do that.
-- If you have your own blog, use Join this site
to have notifications of my posts sent to your blog's reading list.
-- If you don't have a blog,
use Follow by Email: new-post alerts will be sent to your email address. Pictures aren't included; that's just how Blogger does it. For the pictures you come here!
Fora and vendors that I can recommend from experience are listed in the right sidebar.
For more about the ads, and just why I enabled them, please see "About the ads," below.
"And the LORD God made ... trees that were pleasing to the eye ..." Gen. 2:9, New International Version.

"Bonsai isn't just something I do; it's part of what I am." Remark to my wife and daughter.

Sunday, November 13, 2016

A Grafting Tip

(Readers who receive the Fort Wayne Bonsai Club newsletter will see this in the current issue in slightly different form.)

     During the Exhibit Critique at the 2016 Mid-America show, Colin Lewis described a grafting technique that gets around one of the common difficulties encountered in grafting. That difficulty is making sure that the cambium of the scion and the cambium of the stock line up with each other at all (or almost all) points. Until your eye has been trained by some experience, making sure that the cambium layers line up all around can be a very frustrating affair.

The technique Lewis shared abandons any attempt to make the cambium line up all around in exchange for eight guaranteed points of cambium-to-cambium contact. Let 
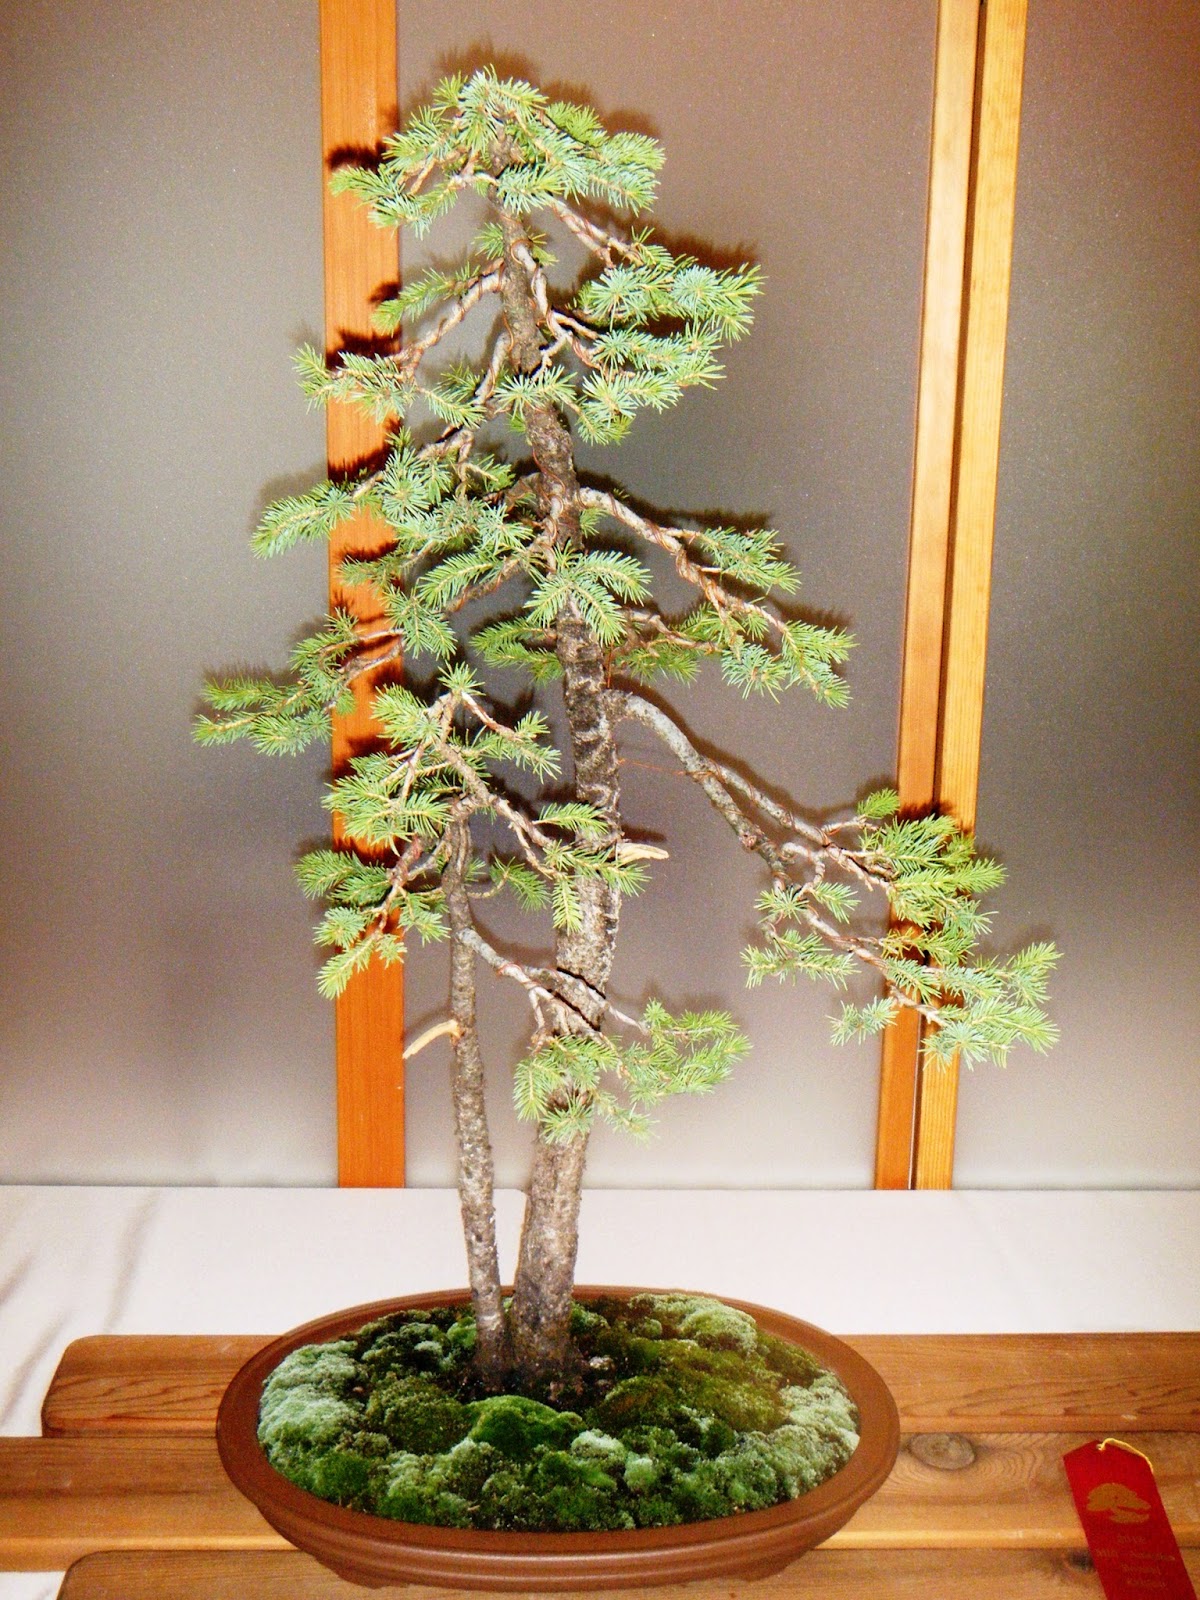
me try to explain the method, using some twigs cut from the ash tree in our front yard for the purpose. (In case anyone wonders, the intent of this post is to explain and illustrate the concept, not record an actual graft.) 

Step 1. The first step is to trim the scion flat on one side. The cut needs to be as smooth as possible. Then turn the scion over and trim the opposite side in the same way. The surfaces of the trimmed areas need to be as close to parallel as possible.

The green arrows point to the cambium, the thin green layer between the brown of the bark and the off-white of the sapwood.
The chartreuse arrow points to the foliage end of the scion.

This technique, by the way, can be used equally well when a seedling or rooted cutting is being grafted in and its own roots are being retained until the graft takes. You just trim down into the sapwood on opposite sides, as illustrated, at the point on the scion where you want it to contact the stock. Make the trimmed-down area just slightly wider than the flap bed (the exposed area of cambium and sapwood on the stock; see picture 2.)

Step 2. Cut the flap in the stock.

Again, the green arrows point to the cambium, the chartreuse toward the foliage.

Step 3. If the scion is thin enough after trimming, you can skip step 3. But if the scion is thick enough that you won’t be able to close the flap properly, you need a notch, no wider than the scion and just deep enough that the upper surface of the scion lies flush, or nearly flush, with the top of the notch. Note the red arrow! If I had actually been making a graft, rather than simply trying to illustrate a technique, I would not have left the floor of the notch so rough. For an actual graft, it needs to be smooth and flat.

Do not leave the floor of the notch rough like this.

By the way, you can make the notch at any angle you choose, depending on the angle of growth you want the new branch to take. Handy, huh?


Step 4. When you lay the scion in the notch, the line of cambium on each side is going to cross each of the lines of cambium in the stock. That gives you four firm points of cambium-to-cambium contact, two on each side of the scion on its underside. 

Each of the green circles sits above a point of cambium-to-cambium contact on the underside of the scion.

Step 5. The underside of the flap also has two longitudinal lines of cambium, and when you close the flap, each of them is going to come into contact with each of the two cambium lines on the upper side of the scion. This gives you four more points of cambium-to-cambium contact.

You now have four cambium-to-cambium points of contact on the underside of the scion, and four on the upper side, for a total of eight. This is enough for a good join.

Again, each green circle sits above a cambium-to-cambium contact point on the upper side of the scion,
as well as one on the underside.
It's important that the flap lie flat or nearly so, so that cambium-to-cambium contact can be re-established between the flap and its bed. Otherwise, you risk some dieback and an unsightly wound.

(Don't forget that when you make an actual graft, there are other things to consider as well: a very sharp knife and good aftercare, to name just two.)

Lewis pointed out another benefit of this technique: Sometimes the stock branch is intended to be cut off after the graft takes, and the scion is intended to take over. In that event, you’ve introduced some movement into the eventual finished branch in the process of making your graft!

:-)  :-)  :-)

Friday, September 30, 2016

Fort Wayne Bonsai Club Fall Show, 2016

     The Fall Show that I invited all and sundry to visit, held last Saturday, went very well. We had a very good turnout, due in part to the fact that another Japanese-themed event was held in another part of the Foellinger-Freimann Conservatory that same day. Undoubtedly some people on their way to the "Japanese Family Event" stopped on the way to take a look at our bonsai, and some who came to our show then decided to proceed down the hall to the Japanese Family Event. Win-win!

As I've mentioned before, I'm not nearly the almost-instinctive photographer my wife is. On top of that, my camera's battery died early on. Still, I did get a few pictures worth posting.

Club members were enthusiastic about bringing their trees; we may have had the biggest display yet.
Jeff and Bruce appear to be deciding whether to break my camera or just make me pay a ransom! (Just kidding.)
Ed discussing a point with one of our newer members, while Becky takes a turn at the sale table.
The next two pictures were taken with my smartphone camera after my regular camera was electrically dead. Please forgive the picture quality.

A yamadori ponderosa (Pinus ponderosa,) and a crepe myrtle (Lagerstroemia indica) in eye-catching bloom. 
Larry Benjamin's splendid trident maple (Acer buergerianum.) I know I posted a picture of it after the Spring Show,
but this tree is worth showing again. And the smartphone's picture produces something of a silhouette effect.

As at the last several shows, I spent most of the time at the work table in the Conservatory lobby. Any work I got done was, in a sense, a bonus: my primary reason for being there was to pique visitors' curiosity and encourage them to stop at the display. That often involved answering questions about bonsai, which I am never loath to do. (Just ask my lovely wife.) One man in particular, altho he has no bonsai experience, had a number of very perceptive questions.

My demo tree, an Austrian pine (a.k.a. European black pine,) before work started. Pinus nigra.
The demo tree after the day's work. As one wit said, "If you're not appalled at what you've done, you haven't pruned enough!"
I've been shaping this tree a little at a time over a number of years, aiming for a semi-cascade (one of my favorite styles) without constraining its own quirks too much. This season it was allowed to grow wild until the Show. In this work session I cut it back to encourage compactness and ramification, thinned the foliage, and repositioned the first branch and the "lion's tail." Next spring it will be repotted and then allowed to grow untouched for the rest of the season. Major wiring will follow in 2018, and I hope to have it into a display pot within a couple of years after that.

I bought this and a few other Austrian pines when I was looking for a tough, esthetically pleasing and readily available species to recommend to bonsai beginners in this part of the USA. I have since decided that yews fit my criteria better, and have switched much of my focus to them. (See this page to read more.) But I'm still working with this Austrian and a few others, just to see how they'll turn out. 

:-)  :-)  :-)

Saturday, September 17, 2016

Bonsai Display Coming Up in Fort Wayne

     If you are:
          - a bonsai practitioner;
          - a bonsai enthusiast;
          - interested in bonsai;
          - just curious about bonsai;
          - or just curious, period --
     -- we'd love to see you at the Fort Wayne Bonsai Club's 2016 Fall Show next weekend! If you live in northeastern or north-central Indiana, northwest Ohio, or southeastern lower Michigan, you're within easy driving distance.

Date: Saturday, September 24, 2016.

Time: 10 AM to 3 PM, Eastern time.

Venue: Foellinger-Freimann Botanical Conservatory, Fort Wayne, Indiana.

Members' trees, of many species and sizes, will be on display. You may well see species that you never thought of in connection with bonsai - such as a tree-like succulent from Madagascar, just to name one. Club members will be ready to answer your questions about the art or about individual trees.

A sale table will offer starter plants and pre-bonsai, accent plants, pots and probably a few random bonsai-related items. In addition, Scott Yelich of Indianapolis, owner of Eagle Creek Bonsai, will be with us. Scott will offer partially shaped trees, pots, and (I think) some accessories. And some of his ribbon-winning trees may be included in the display.

And there will be ongoing live demonstrations of bonsai techniques in the Conservatory lobby. You may be able to watch as the answer to one of your questions is demonstrated. Please note: Interruption of the demonstrators to ask questions is emphatically permitted!

Here are a few pictures from past Fort Wayne Bonsai Club shows.

This Japanese maple (Acer palmatum) belongs to the club, and might be considered the club's "signature tree."
Spring 2016 Show.
A member's Ficus microcarpa at the 2014 Fall Show.
A young show-goer considers where to cast his "people's choice" ballot.
Fall 2012 Show.
Ed Hake mans the sale table. Besides being one of our most knowledgeable members when it comes to plant care,
Ed is a retired bank official. So he's good with plants and money. Fall 2014 Show.

Ben McHugh works on a shimpaku juniper in a styling demonstration. To his right is the tree he styled
in the Joshua Roth New Talent Competition at the ABS Symposium a week before. Spring 2016 Show.

The Club's display is being held in conjunction with the Conservatory's "Our Japanese Sister" family event. This will include a replica of a Japanese garden in the first Exhibition House, demonstrations of the tea ceremony at 12 and 2 PM, ikebana, Japanese food, and more! For more information on this event, go here.

The Foellinger-Freimann Botanical Conservatory is located at 1100 South Calhoun Street, Fort Wayne, IN 46802. There is a special admission price that day of $3 for adults, $2 for children; kids under 2 get in free. Parking meters are free on the weekends.

Hope to see you there!

:-)  :-)  :-) 

Saturday, September 10, 2016

Spruce, Unconventional Bonsai Design and "Chef's Pants." M-ABE 2016, Headliner's Demonstration.

     This is the raw stock Colin Lewis used in his headliner's demonstration on August 20 at the Mid-America Bonsai Exhibition: a yamadori Black Hills spruce, Picea glauca densata, collected by Andy Smith. I don't remember hearing its estimated age, but if I were asked to guess, I'd start at 80 years. (And that's probably 'way too low.)

Demo tree for the headliner, Colin Lewis, at the 2016 Mid-America. Yamadori Black Hills spruce,
Picea glauca densata, collected by Andy Smith of Golden Arrow Bonsai.
The headliner's demonstration is a regular part of the Mid-America show, and is always worth attending. Usually it involves creation styling: taking raw stock and performing the first major shaping that sets the design and future shape of the bonsai-to-be. In the case of this spruce, that design to turned out be a bit out-of-the-box; more on that a little later.

The auditorium was still filling at the appointed starting time, so Colin Lewis came out and made a few introductory remarks; including, as best I can remember his words, "And I'm sure you're all wondering 'What's this idiot doing up there in his pajamas?'"

What he was wearing did look like pajama pants at first glance. I was thinking, one, that they reminded me of the medieval character Harlequin; and two, that at Lewis' age he can pretty much wear whatever he pleases! Lewis explained that they're "chef's pants," and superbly comfortable. They certainly looked comfortable, enough so that I'm considering getting some myself.

Colin Lewis listening to a question, wearing his chef's pants.
 Lewis apprentice, Maliea Chiem, was also wearing chef's pants as she assisted with the demo. It was obviously his idea, but she was a good sport about it.

Colin pauses his work on one jin to listen to another question,
as Maliea Chiem considers the next step on the jinned top.

Maliea Chiem has been Lewis' apprentice for three years, she said, having been his student for two years before that. She clearly knew what she was doing; it won't surprise me if I see her out on her own as a bonsai teacher in a few more years.

Lewis uses copper wire exclusively on conifers.
At one point I asked Lewis what he saw as the life story of the tree that this bonsai-in-the-making represents. He thought a moment, then said, "I'll tell you when it becomes clear to me." (Approximate quote.)

This next picture isn't all that good, and I apologize for its quality. But it lets me tell you this little story: Maliea Chiem was using the sprayer to keep the deadwood wet while she worked on it. When someone in the audience observed in a voce that that was deliberately not sotto enough that she could always give Colin Lewis a squirt with the sprayer, she took the hint! Maybe it was payback for making her wear the chef's pants. (How do I know the hint was "deliberately" loud enough for her to hear? Take a guess.)

Wielding wire and sprayer.
In an earlier post I mentioned Colin's assessment of Scott Yelich's F. burtt-davyi in the Critique the evening before: "It's a shambles! But it works." Lewis's final design for this tree wasn't "a shambles," but like Scott's Ficus it stepped outside the established norms of bonsai design. Specifically, a major branch on this tree crosses the trunkline; that is not supposed to happen because it usually doesn't work well visually. (The only accepted exception (say that five times really fast!) is when the tree is styled as a windswept, and this is not.)

Colin Lewis said essentially the same thing about  a few other bonsai during the Critique: they bent or broke an accepted design rule or two, but they worked anyway. The same is true of his design for this spruce: it works anyway. My next picture isn't as good as I'd like, but I think it will help you imagine this tree growing on a harsh mountainside, unconquered by the rain, wind, snow, rockslides, and you-name-it.

The finished design. You can see the major branch crossing the trunkline just below the bend.
Convention is broken on that point, but this design works.
A silhouette view.

Imagine it at sunset, positioned against the sky.
The finished product from the headliner's demo is usually auctioned off at the banquet that evening. I haven't heard who bought this tree, but I look forward to seeing it on display in a few years.

Let me stop to point out one thing. The bonsai that broke major rules but still worked were the exceptions; most designs that break major design rules don't work. Every now and then, bending or breaking a rule is actually necessary to achieve the image the artist wants to bring out. But only now and then. And you must develop a clear and in-depth understanding of the bonsai design rules, and the standards behind them, before you can recognize those uncommon occasions when you should break one to preserve something deeper.

Next post: a few nuggets of learning. (Unless something else comes up and seems more compelling.)

:-)  :-)  :-)

Sunday, September 4, 2016

Mid-America Bonsai Exhibition 2016: Some Other Interesting Trees

     I'm not sure how many bonsai in all were on display in the exhibit, but I think it was close to 200. Here are some others that caught my attention. (I give the artist's names where I know them.)

1. If you're at all familiar with J.R.R. Tolkien's tales of Middle-Earth, you'll know why this one delighted me!

A hobbit dwelling, round door and all! Chinese elm, Ulmus parvifolia
My wife is also a Tolkien fan, so I emailed this picture to her even before I returned home.

2. You may recognize this yew from this post two years ago. At the 2014 Mid-America, Rodney Clemons, the headliner, pointed out that what this tree needed most by way of improvement was to have the apices shaped to match the rest of it in apparent maturity. As I approached it this year, I saw that what Clemons had recommended had been done, and the result was good!

Hybrid yew, Taxus x media. This tree was obtained as an "urban yamadori." Ray Heinen, owner and artist.
A first-time Mid-America-goer named Justin was with me, and I started describing to him how the tree had looked two years before, what Rodney Clemons had recommended, that it had been done, and now we saw the result. As I was talking, the owner of the tree came up, Ray Heinen. (My apologies if I have it wrong and it's actually "Roy".) He started laughing: he could hardly believe that I remembered his tree from two years before, let alone everything else I was telling Justin!

After a bit Justin and I went over to another bonsai I remembered, a Ficus salicaria forest. Justin is fairly new to bonsai, so again I described for him how this one had looked before, the changes I could see, etc. Ray Heinen came by again, and again started laughing: that bonsai is also his, and once again he was almost floored that I remembered it in that much detail!

We were all still talking when another member of the Fort Wayne Bonsai Club appeared in the exhibition hall, and I greeted her: "Hello, Wanda." "Hi - but my name's Deanna." As I started to apologize, Justin started laughing: "You remember the trees, but you don't remember the people!" (I heard that several more times in the course of the day. But I have to admit it was funny!)

3. How's this for an unusual container? This Florida buttonwood is one of several belonging to Paul Weishaar of Indianapolis. At first I thought it was all one plant; part of it had died, and Paul adapted that part into a container for the rest. Mark Fields, also of Indianapolis, told me it's actually two buttonwoods; when the larger one died, Paul made it into a one-of-a-kind container for the smaller one. Very creative!

Florida buttonwood, Conocarpus erectus. Notice how the accent plant's leaf shape resembles the buttonwood's.
Paul Weishaar, owner and artist.
Here's a closer view.
Notice the artificial weathering that's been done to all the deadwood.

4. Maybe there's a revival of fantasy literature among the US bonsai community. The label for this boxwood listed its style as simply "Fairy Tale." (I wonder which tale?)

Buxus spp. The pot rather fits the "fairy tale" label.

5. This shohin-sized neagari azalea is well matched with its accent plant, and the styling is well done. The pot color is an excellent choice for this tree, in my opinion.

Azalea, Rhodendron spp. Owner and artist, Tim Priest.

But given the "airy" look of the exposed roots that substitute for most of the trunk, I couldn't help wondering if a simple wooden slab might be as good as the tall stand. So I fiddled with the picture to try to get some idea how that might look.

Imagine this bonsai on a flat slab, no light showing under the slab
Which looks better to you? Comments are welcome.

6. This little trident maple has one of the best nebari I've seen on a mame tree.

Trident maple, Acer buergerianum.

7. This Japanese white pine triggered an "Ah-I-hadn't-thought-of-that" moment, when I saw what the artist had done to make the tree three-dimensional and still use a deadwood upper line.

Japanese white pine, Pinus parviflora.

8. Not only does this shimpaku have some pretty cool jin, but it's planted in a stone. Literally: the stone was hollowed out to make a container for it.


Shimpaku juniper, Juniperus chinensis 'Shimpaku.'

9. I'm not going to post the name of this tree's owner and artist on a public site, because he's all of eight years old (maybe nine.) But he has a definite interest in bonsai and is already showing some unmistakable aptitude. His father, a bonsai professional, told me that the tree was gift from a family friend and he provided his son with the pot. But the young man did the styling and potting on his own, and I think also chose the stand and the accent plant. Not bad at all!

Crown-of-thorns, Euphorbia spp.

Next post: pictures of the headliner's demonstration, including Colin Lewis and his apprentice in "chef's pants."

:-)  :-)  :-)

Monday, August 29, 2016

"It's a shambles! ... But it works." M-ABE 2016, Exhibit Critique.

     I've said before that, in my judgment, when it comes bonsai learning opportunities, an exhibit critique gives you the best value for your money. The Exhibit Critique at this year's Mid-America just made me all the more sure that's true!

(I'm referring to the bonsai scene in the USA. Never having been to a bonsai event outside this country, I don't feel qualified to comment on what is the best value elsewhere.)

Colin Lewis, this year's Visiting Master, was educated and trained as a graphic designer, and practiced that profession until he relocated to the USA and went into bonsai full-time. So he has a fine grasp of design principles, and most of his observations came from that perspective.

Colin Lewis discussing a ponderosa pine bonsai by Andy Smith during the Exhibit Critique; August 19, 2016.
His assessment: Interesting trunk movement, good deadwood, unusual pot. Good composition overall,
except that the foliage arrangement makes the tree look young.

Colin first discussed the Best of Show trees (Open and Professional.) His comments and insights on those were the subject of my previous post. Following are some things he had to say about some of the other trees. (Paraphrased, for the most part, but I believe accurately.)

1.
Veldt fig (Ficus burtt-davyi) twin-trunk upright. Artist and owner, Scott Yelich.
Before commenting on this tree, Lewis first told us that he has no experience with tropicals. Speaking from the perspective of bonsai design, tho, he said this tree breaks so many rules: it's hard to find the main trunk, or even be sure how many trunks there are, and there are aerial roots roots all over the place "going in and out." "It's a shambles!" he exclaimed. Then he paused and said very seriously, "But it works." He added, "It looks natural."

(I later had a chance to tell him that growing up in Ecuador, I had seen full-sized trees that look much like this.)

2.
Elephant bush (Portulacaria afra,) root-over-rock upright. Artist and owner, Paul Weishaar.
Lewis also said of this composition that "it works." He seemed reluctant to say more because he doesn't know much about tropicals, but he considered it deserving of a ribbon!

3.
European beech (Fagus sylvatica,) grove planting. Artist and owner, Gary Andes.
 A good bonsai composition, in Lewis' opinion. The "fan" look to the grove is natural, he said; younger trees will lean away from the older ones as they reach for light. He added that if this were American beech (Fagus grandifolia) the leaves would be twice as big; if it were Japanese beech (Fagus crenata, probably,) they would be half as the size they are.

4.
Japanese red pine (Pinus densiflora,) slanting bunjin. I didn't get the artist/owner's name.
This Japanese red pine, Colin Lewis said, has outstanding and interesting trunk movement and good shari. But on the flip side, the canopy is too big for the overall design.

5.
Black Hills spruce (Picea glauca densata,) twin-trunk formal upright.
Owner and artist, Mark Kargenski (I hope I spelled that surname correctly.)
Colin seemed to find this composition downright delightful! It's rare to see mature bark on a spruce this thin, he said, and the proportions between the trunks are just right.

6.
Shimpaku juniper (Juniperus chinensis 'Shimpaku',) group planting on a rock. Owner and artists, Dick Ruemmelle.
Finding a ceramic suiban this size is almost impossible, Lewis said, so we'll accept the plastic. His main point of praise for this composition: It looks completely natural. This is how trees grow in such a situation. (He had no negative comments to make about it.)

7.
California redwood (Sequoia sempervirens,) upright clump. Artist and owner, Jim Doyle.
This design is very natural, Lewis said, especially with the "daughter trees" appearing around the base. He considered both the pot and the accent to be good choices. He praised the unconventional decision to use multiple small sheets of hard white plastic to make up a "stand," adding that a single large sheet of the same material simply wouldn't have worked. On the flip side, there is a knob near the top of the main trunk, and that long, fairly straight stretch of the main trunk. But both of those issues, he expected, will be addressed as Jim Doyle continues to refine the tree. (Jim later told me that he has a large picture of a wild-growing California redwood at home, which he is using as the model for this bonsai.)

8.
Trident maple (Acer buergerianum,) formal upright. Owner and artist, Mark Fields.
This impressive trunk is actually made up of 200 trident maple whips that were forced to fuse around a conical core by a grower in California. Mark Fields, now owner of the tree, was present in the Critique; he gave the number of trunks and confirmed that the inside is still hollow. (There are still a few chinks here and there between the component trunks, Mark added, and occasionally a shoot will sprout inside in response to light getting in.) Colin found the tree quite impressive and well-cared-for. He pointed out only one thing that needs to be improved: the somewhat bell-shaped canopy should be more rounded to give more of an impression of maturity.

9.
Willow-leaf fig (Ficus salicaria,) twin-trunk upright; close-up of the nebari. Owner and artist, Kurt Smith.
This, Colin Lewis pointed out, is more typical of how a nebari grows in nature than the regularity we so often impose. The latter can look a bit artificial. As for the rest of the tree, Lewis said (with, I think, a note of regret,) "It looks like a pine."

(I emailed this picture to my wife later that evening, asking her to imagine this nebari full size and picture it in "Jurassic Park!")

Next post: some other trees I found especially interesting.

:-)  :-)  :-)

Monday, August 22, 2016

39th Mid-America Bonsai Exhibition: Bests of Show

     Again, "Bests" is not a typo; I meant to write it that way. Two "Best of Show" awards are given at the Mid-America, one for Open class and one for Professional.

This year the "Best of Show" (Open) went to this stunning Sierra juniper (Juniperus occidentalis var. australis,) owned and styled by Tim Priest of Michigan.

"Best of Show," Open class, 2016 Mid-America Bonsai Exhibition. Sierra juniper, Juniperus occidentalis var. australis.
Owner and artist, Tim Priest.
Colin Lewis, this year's Visiting Master, couldn't seem to find enough good things to say about it during the Friday evening Critique! The tree is in superb health. The balance of deadwood to live bark is excellent. In styling, the artist worked with the natural movement of the tree, rather than trying to force the tree into a stylistic "box." The incidental details of design and of grooming were not neglected: for example, the undersides of the pads are all clean, with no shoots hanging down. (No "droopies," in Roy Nagatoshi's term.) In Colin's judgment, no better pot could have been found for the tree, and while the pot was well-oiled, it wasn't at all shiny. The mossing was very well done. I think I heard a note of awe in Colin Lewis' voice as he discussed this bonsai!

The only thing he might suggest, Colin said, if he were asked how the tree could be improved, would be that it wouldn't hurt if the jin and shari were just a little bit lighter. But he hesitated audibly to even say that much on the negative side!

The tree is a yamadori, collected in the Sierra Nevada of California. I didn't hear the collector's name. It's estimated to be 300 years old, and has been in bonsai training for six years, I believe.

Prior to winning "Best of Show" in Chicago this past weekend, this tree won second place in the Artisans Cup competition in Portland, OR, last year. And it came within a fraction of a point (literally) of taking "Best of Show" at the Michigan All-State Bonsai Show in May. I think it is going to keep winning major awards for a while. (Ya think?) If I heard correctly, Tim Priest plans to enter it in the National Bonsai Exhibition, hosted by William Valavanis, in September.

And speaking of Valavanis: what can I say about an artist who may well have won more awards than any other bonsai practitioner in North America? Once again Bill took the "Best of Show Professional" award, and once again the tree fully deserved it!

"Best of Show Professional," 2016 Mid-America Bonsai Exhibition.
Dwarf Scots pine, Pinus sylvestris 'Beuvronensis.'
Owner and artist, William N. Valavanis.
This tree, Colin Lewis said, shows the effects of meticulous care and painstaking work over many years. (That might confirm a report I heard that Bill grew the tree from seed.) When you work with a tree for many years, Lewis pointed out, you get to know it well - not just the species, but that individual tree. After a while, he said, it's as if the tree and the artist are working together.

Besides the skillful styling and the excellent taper, Colin pointed out that, as with Tim Priest's Sierra juniper, the tree was clean and well detailed. The pot and the tree are a perfect match, he said, and once again the mossing was superbly done.

But what Colin Lewis particularly praised on this pine was the nebari. "You will not find," he stated flatly, "a better nebari on a pine anywhere." The nebari also showed the result of good long-term planning, he said. When the pine was a seedling, the roots were spread out (as is common practice) to develop an eventual nebari. But the grower (I presume Valavanis) thought ahead, and spread them out enough that the eventual nebari wasn't swallowed by the expanding trunk. What good does it do, Colin asked, to spread the roots out four inches if the trunk eventually engulfs the first three?

After listening to all Colin Lewis had to say about this pine's nebari, I went back the next day and got a close-up.

Nebari of William Valavanis' Scots pine. Besides the root structure, notice the different varieties of moss
that add visual interest, and the lichens here and there.

Bonsai like these prompt me to think, Here's what can be done. And while I may not be able to match what these artists have done, I'll be the better for trying. And my trees will be better too.

:-)  :-)  :-)

Tuesday, May 17, 2016

An Upside-Down Aquarium -

     - can make a very effective humidity cover for new cuttings.

I took a few cuttings today, two each from four different species of Ficus: Ficus microcarpa 'Tigerbark,' F. buxifolia, F. salicaria and F. burtt-davyi. Because all these species are tropical and our temperatures are still doing some crazy swings (we had frost this past weekend,) I'm keeping the cuttings in the Crate for at least the first several weeks.

Even the high humidity I can maintain in the Crate isn't enough for fresh cuttings. They need a humidity cover to keep the air around them (almost literally) dripping wet. We have two aquaria  that aren't in use for anything else; so I took the smaller one, cleaned it up, flipped it upside down, and voilà- instant humidity cover!

Pampering the new cuttings until they root. May 17, 2016.

An inverted aquarium works well for the purpose for several reasons. The glass lets in plenty of light; the joins between the panels are watertight; it's heavy enough that accidentally brushing it with the hand won't knock anything askew; and while there's enough space for the two RMP Rootmakers® holding the cuttings, there's not a lot of extra space where I must try to keep the air saturated.

If all goes well, within two to three months I'll be able to pot up the new tree-lets in individual pots. I plan to graft one of the 'Tigerbark' cuttings into its own parent plant at a point where a new branch is needed. As for the rest, we shall see.

:-)  :-)  :-) 

Friday, May 13, 2016

Continuing to Repot - with Care

     A little over a month ago I wrote about the dilemma facing many of us in this part of the USA: with our weather patterns so weird, should we repot in response the normal indicators (swelling buds, etc) or wait - maybe even forego repotting for a year? (If you want to refresh your memory, click here, then come back.)

As I indicated in that post, I decided to proceed with repotting but take some extra precautions.

Two trees I've recently worked on are hybrid yews, Taxus x media 'Densiformis.' I acquired them both almost two years ago from the "Clearance" section of a local DIY's garden center. Both had been allowed to dry out too far and were in serious distress; their survival was uncertain for a number of months. I babied them with frequent mistings and extra attention all last season, and I'm thankful to say that it paid off. Both trees came out of dormancy this spring in vigorous health and breaking new buds all over the place!

Unfortunately, by the time I could get to their repotting, buds on both trees weren't just breaking, but bursting. As many readers will know, you take a risk with yews if you repot them after the buds are already opening. So I handled the roots as gently as possible and did almost no root pruning on either.

Since these yews came from a general-purpose garden center, it was anyone's guess how much of the trunk of each was buried, where the nebaris would be found, and how they would be angled. That's just something you deal with when you buy from a general purpose source; I actually often enjoy the added bit of challenge.

Fortunately, the first one was not especially root bound. The angle of the nebari (once I found it) was such that the tree will most likely end up a semi-cascade, tho it will be several years before it is ready for creating styling.

Taxus x media 'Densifomis' B190, April 24; cleaned up and ready for repotting.
Some live roots ended up sticking into the air after I got the nebari leveled - they'd all been growing at a different angle for several years, after all! There were enough such that - again, wanting to save as many roots as possible - I covered them with sphagnum to keep them moist while the tree adjusts. I also mulched the rest of the surface of the substrate with sphagnum.

Please forgive the quality of the next two pictures. I'm afraid I don't have any other "after" photos.

Probable front, altho that could change. The lower trunk looks best from this side.
Probable back.
The second tree was rootbound, and badly; the rootball was full of small roots that had been killed by overcrowding. Most of the live and viable roots were near the bottom of the rootball. Again, I couldn't afford to lose any live roots if I could help it, so reduction of the roots' depth will be done in stages over several repottings.

Taxus x media 'Densiformis' B191, May 11. You can see the new shoots opening.
With the rootball cleaned as much as I dared under the circumstances. 
A closer look at the root mass. That's my left hand at the side of the picture.
You can see in the last two pictures that most of the original trunk was buried; what look like multiple trunks in my first picture of this tree are actually the primary branches. But you can also see that there is a significant reverse taper just below the point where the branches emerge. Because of that, and because I think the design idea will work, I plan to make this yew a 5-trunk clump.

To develop a new nebari, I punched a series of wounds all the way around the trunk, one-half inch to one inch below where the primary branches initiate. (A few of them show as light spots a little above the soil line, in the picture below.) Rooting hormone was applied to the wounds, and that area was packed with sphagnum as the last stage in the repotting.

With substrate filled in to just below the circle of wounds. Rather than run the tie-downs over the area
where I want to see a new nebari, I looped them around branch bases. This is the most likely front.
The picture doesn't show it, but the sphagnum is packed higher right around the trunk, covering the hormone-treated wounds.
I finished this job in the rain, which is why everything - including me - was wet!
(I have no idea what caused the lighter area on the picture's right.)
The wound-then-apply-rooting-hormone-and-pack-with-sphagnum technique is one that works with many species, especially many tropicals. One of the characteristics of 'Densiformis' is an unusual readiness to break new buds, be they foliage buds or root initiations, so I think there's good reason to expect the approach to work on this tree.

(That readiness is another reason I was willing to take a chance on repotting these two yews after the optimum window was well past.)

This tree is a long-term project; I expect it to take at least five years to develop a new nebari to the point where it can support the tree on its own. But if I can do it justice, I think this yew will turn out to be a bonsai "not without merit."

:-)  :-)  :-)