After our first year or two in bonsai, most of us have heard of the reason for in-ground growing: Put a bonsai-to-be in the ground, where the roots can ramble, and it will bulk up more quickly than it would in a pot. (Sometimes
much more quickly.) But what do you do when you don't have room for a growing bed, even a small one? When your yard ("garden" to my British friends) isn't even big enough to win the respect of a postage stamp?
A couple of years ago an idea occurred to me. We do have some landscaping around the house: why not put a few bonsai-in-training in among the peonies and annuals? The trees can serve as landscape shrubs for a few years, adding a bit of visual interest while they put on girth. (I didn't get the idea from anyone else, but at the same time, I'm sure I'm not the first person to think of it.)
 |
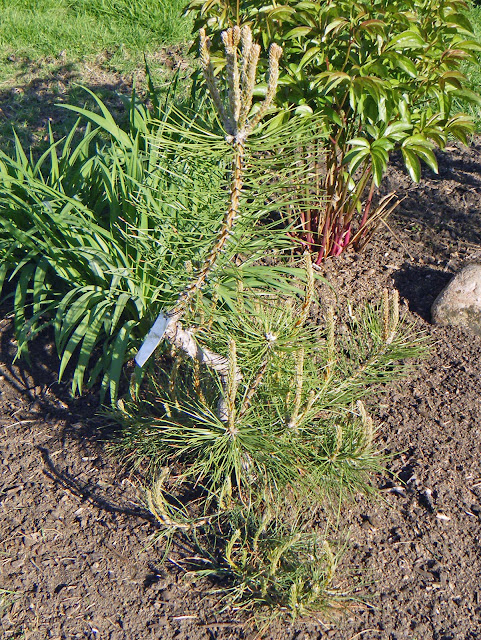
| June 2010. The top shoots are beside the daylily blossom. |
The lady wife had no objections, so when I prepared a small landscaped island in the front lawn, I put in a young Austrian pine (
Pinus nigra.) This was one of several small Austrian pines that I bought in order to see if the same management techniques that work for Japanese black pine (
Pinus thunbergii) will also work for
Pinus nigra. Later I added a small ponderosa pine and a 'Densiformis' hybrid yew.
I put the pine in the ground in mid-June of 2010. Please forgive the dismal quality of the first picture: it's the only one I have. I think you can still get some idea of the tree's size at the time.
 |
| March 2011. Growing nicely. |
In March of 2011 it was doing well, and I wired it to give some basic movement to the trunk. The sacrifice leader at the top was bent so as not to cast any shade on the lower part of the tree -- then I realized I had bent it south, not north! I reversed the bend after the third picture was taken.
Again, not a very good picture, but I think you can see that the tree's doing well. (I now have a better camera.)
 |
| March 2011. Yellow arrow: this shoot will become the sacrifice leader. |
The tree came thru last summer's serious drought with no visible damage, and woke up strongly this spring. A careful look a couple of weeks ago was quite gratifying: all the branches are growing well, and the trunk has at least doubled in diameter since it went in the ground.
☺
 |
| May 2013. Ready for some work. |
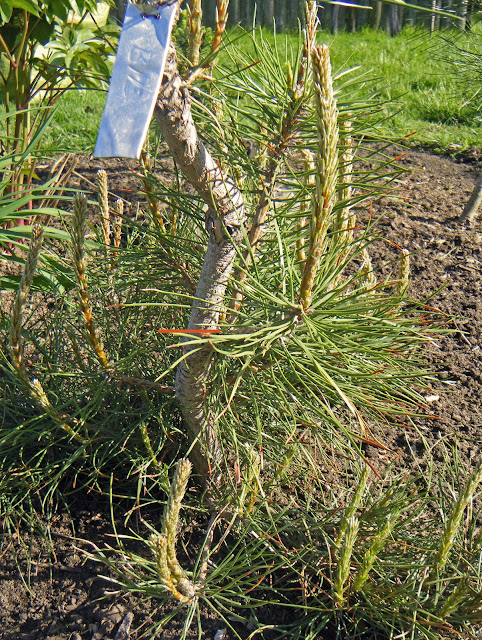 |
| May 2013. I actually chopped it about 1 inch (3 cm) below the orange line. |
Since it's vigorous and healthy, I went ahead with a trunk chop. For any who don't know, this will promote the development of both taper and trunk movement.
 |
| May 2013. Chopped! |
Ideally, this pine should have two more years in the ground. But we're considering a move, so it remains to be seen when it will be lifted and potted up.
A few days after I did the chop, my daughter put in the first of this year's annuals, as a Mother's Day surprise for her mom. I'm happy to say that the surprise was a success in every way!
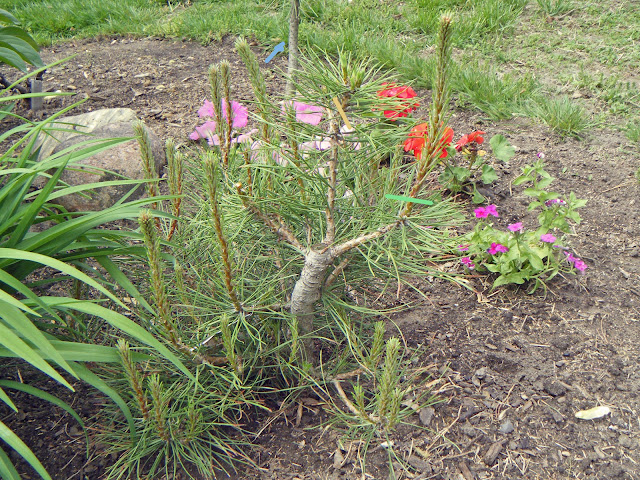 |
May 2013. Blue arrow points to the small ponderosa that's also in the bed, not to another leader on the Austrian pine.
Once the candles mature a little more, I'll cut at the green line, to force branching on the eventual new upper trunk. A cut at the yellow line will leave a new sacrifice leader. Most of the present lower branches will eventually be sacrificed. |
:-) :-) :-)


No comments:
Post a Comment